

When it comes down to getting the most out of your ride, the most influential factor is the ability to adjust your front and rear derailleur. The derailleurs are the quintessential items when it comes to your gears. The question we are asking is, can you adjust your gears upside down?
You can adjust your gears upside down, but you do not have to. The only time it is necessary is when you are riding on your own, and you need to make the adjustments spontaneously during a ride. However, if you have hydraulic breaks, turning the bike upside down is never advised.
This will forever be a question that is debated. So, in this article, we will take a closer look at what exactly is involved when adjusting your gears, and, hopefully, with our experience, we can answer your questions.
Adjusting Your Bike Gears Upside Down: Best Methods
There are a few different methods that people opt for when adjusting the bikes gears, some of which I have put below:
- Use a bike stand (Easiest)
- Turn the bike upside down (Most accessible)
- Tip it up in the kickstand (If available)
- Lay it completely flat on its side (Not recommended)
When it comes to working on your bike, you will see most bike shops using stands. These stands are great to have and allow for you to do maintenance without the possibility of damaging your bike.
The downside of bike stands is that you can’t take them on a ride. So, what do you do when you need some repairs on the fly?
Well, the best and easiest option is to turn the bike upside down. Doing this allows for easy access to the derailleur at a workable height.
You could always tip the bike onto the kickstand if you have one available, but mainly due to safety reasons, many bikes don’t have kickstands, not to mention the fact that you are going to need some help to keep it angled on the stand while you make adjustments.
QUICK TIP: Do not ever lay the bike on the derailleur. Not only does this not make sense, but if the derailleur is damaged in any way, you will have a lot more problems than just having to adjust it.
Pros And Cons Of Adjusting Gears Upside Down
As mentioned earlier, cyclists will often argue about adjusting their gears upside down. Let’s take a closer look at the different advantages and disadvantages of adjusting your gears with the bike upside down.
Advantages:
- It is easier and more ergonomic to work on.
- You can see things better, especially with minor adjustments.
- The bike can balance while upside down, so, no need for assistance.
- Allows you to turn the crank to check adjustments easily.
Disadvantages:
- Dust and grit can get in the brakes and gear levers.
- May cause damage to your seat and handlebars.
- The bike may fall over and damage the frame or derailleur.
- It can cause air bubbles in your braking system if left for too long.
Adjusting Your Gears Upside Down: 6 Easy Steps
When it comes to working on your bike, you must use the correct tools.
Luckily, a Phillips head screwdriver is all we will need. If you don’t have one yet, here’s a great choice from Amazon. It’s a 7-in-1 screwdriver set in a compact design that’s easy to carry around.
Now, let’s go through the steps of adjusting your gears from beginning to end.
Get Your Bike Ready
First, when adjusting your gears, you need to set your bike up to work on. We will use the upside-down method. Make sure the bike is balanced and sturdy to offer no possibility of falling over.
Inspection
Inspect your bike before starting any work. This way, you can see if any other issues could be affecting your gearing.
Important places to inspect:
- Check the gear cable of the rear derailleur for rust, kinks, or fraying.
- Check the chain for ridged links.
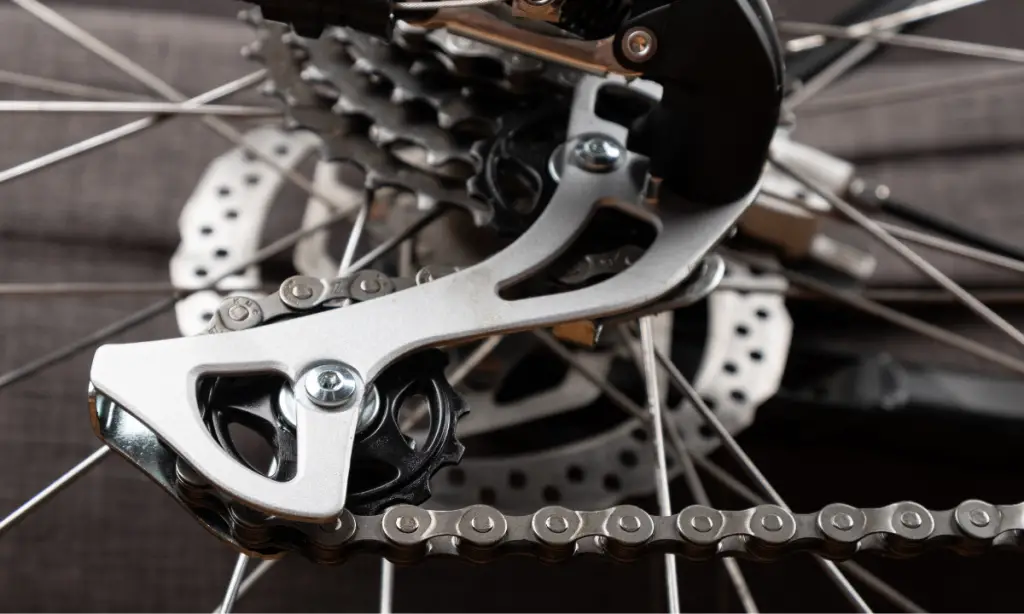
- Check the alignment of the derailleur cage, making sure it is in line with the gears.
Derailleur Adjustment
Shift the bike into the highest gear (the smallest cog on the rear gears) and ensure that the derailleur cage is in line with the cog.
If you see that the derailleur cage is sitting too far out or too far in, you will need to adjust the High Limit Screw. Adjust clockwise if the cage is facing outwards or anti-clockwise if it is facing in.
If your bike does not have High and Low Limit screws, you can use the barrel adjuster to tighten or loosen the cable tension. Turn the barrel adjuster clockwise until the derailleur cage lines up with the cog. Here is an example of a barrel adjuster (from Amazon).
TIP: While adjusting your derailleur, it’s also a great idea to do a complete check of your gears. Here’s an article I wrote on the things you need to regularly check on your bike gear to make sure they are not worn out.
Testing
It is now time to check on the adjustments that you have made.

While turning the crank, you will need to shift gears making sure that the chain shifts smoothly without jumping between cogs. If it is still jumping, you need to tweak your adjustments.
More Testing
Shift the rear derailleur to the lowest gear (the cog closest to the wheel). Make sure that the cage is directly under the cog. If not, adjust the low limit screw clockwise until the cage moves slightly.
Final Checks
Turn the crank once again to check your shifting. Making sure the chain runs the entire time smoothly. If not, you will need to keep adjusting your derailleur until you hit the sweet spot.
Once you have followed the steps and have managed to get everything running smoothly, you are done!
This may sound like a simple process, but it can take anywhere from 10 – 45 minutes, depending on your expertise or the severity of the adjustment.
Is Hanging Your Bike Upside Down Bad?
You will often see people hanging their bikes from the roof. There is no special reason for this other than to save space. The question is whether hanging your bike upside down will damage it?
Hanging your bike upside down only becomes an issue if your bike is equipped with hydraulic breaks. Hanging a bike with hydraulic breaks upside-down can be detrimental to the braking system.
When hydraulic breaks are hung upside down, it can cause air bubbles in the cables or reservoir tank. In turn, this will affect the performance of the brakes, meaning they will feel very spongey and ultimately may not even stop you. You will have to bleed your entire braking system to correct this.
I suggest getting some vinyl wall hooks for storage and hanging the bike the right way up, especially with hydraulic breaks. If your bike has rim breaks, it won’t be affected by the orientation in which the bike is hung.
Final Thoughts
When it comes to working on your bike, it’s a great feeling when you accomplish what you set out to achieve. The hands-on knowledge gives you the ability to do it yourself when you might be stranded on a ride.
If you start working on bikes, I recommend getting someone experienced to help you and show you the ropes first until you get the hang of things. Above all, I wish you happy riding.