
Bike gears slip for several reasons, but when it happens, it can be so frustrating. Fortunately, it’s a fairly common problem with some pretty common fixes.
Bicycle gears can slip due to any of the following reasons:
- loose or stretched cables
- a stretched chain
- your derailleurs require adjustment or are out of alignment
- your sprockets are dirty
Let’s take a closer look into why bike gears slip, some easy ways they can be fixed, and some ideas on how to prevent gears from slipping in the first place.
What is Gear Slipping On a Bike?
Gear slipping on a bicycle is where the gears on the bike either ‘slip’ out of gear on their own, otherwise known as ‘phantom shifting’, or where the bike cannot move into lower or higher loads correctly.
This can be a widespread problem, and while it can be exasperating to deal with, the causes and solutions are pretty easy to apply and get your bike to proper riding condition!
The Common Causes of Slipping Bicycle Gears
Let’s take a look at some of the common causes of gear slipping, along with step by step guides on how to fix it!
Cause #1: The Gear Cable has Stretched
The most common cause of gear slipping is stretched cables. Even if the bike is new, the first few rides are where the cable stretches the most. Cables can also stretch over time as you ride more and more.
The mechanics of the bike require tension to be placed on the derailleurs to change the gears. When the cable has stretched, the degree of tension can often become less over time or, if it hasn’t been adjusted to start with, it can cause the slipping of gears.
Without sufficient tension in the cable to control and regulate the derailleur, your chain will begin to skip gears during riding.
The derailleur is the part of the gear system on the bike that shifts the chain from one gear sprocket to another. The cable connecting the shifter to the derailleur is the link between them, and the cable tension allows the derailleur to shift the chain quickly and smoothly.
A stretched cable will mean that the derailleur doesn’t have enough cable tension to work effectively, and the symptom of this is gear slipping.
Here’s how to fix this cable tension, and stop your gears from slipping…
How to Fix the Tension on Your Gear Cable: 6 Easy Steps
The good news is that, in all likelihood, you won’t need to take your bike to a mechanic to sort this problem out as it’s just a question of adjusting, checking, and then re-adjusting until the tension is correct and the gears change smoothly.
The most common fix for gears slipping is to add tension to the rear derailleur. This is not as complicated as it sounds and can be quickly done with time and patience.
To make it easy to identify and fix the issue, here are six easy steps to fix your cable tension issues…
Step 1: Get Your Bike Into its Highest Gear
Park your bike, and if you have a bike stand, that will make life a lot easier (here’s a great value one on Amazon). Select your bike’s highest gear, (the smallest sprocket), and manually pedal through the gears until the chain reaches that gear.
To check the shifter, press it once to see whether the chain moves up a gear – if it doesn’t, you require more tension.
Step 2: Adjust the Tension using The Barrel
On the derailleur, (toward the backside of it), you will see a small barrel adjuster that your cable runs through. Twist that away from you to adjust it all the way in. This has now added tension to the cable.
Step 3: Check the Shifter Again
With the adjuster barrel now turned to maximum tension, pedal and see if the chain will shift automatically to the selected gear. Keep adjusting until the gears change as usual, and when they operate smoothly, you’ve hit the jackpot!
Step 4: Visually Inspect the Cable for Slack
If the gears are still slipping, you need to check the cable itself visually. If you can see there is too much slack, then you need to adjust the cable tension. If it’s too tight, then you need to add slack.
Your cable can be pretty moody when it comes to tension, so easy does it. It’s just a question of trial and error till you achieve the correct tension. Have some patience in this step!
Step 5: Manually Adjust the Cable Tension


On the derailleur, you will see the actual point where the cable leaves the derailleur. There will be a screw there that secures the cable to the derailleur. Using a screwdriver, loosen the screw or a bolt and pull the cable out to add more tension or push it back in a bit to add slack.
Tighten the bolt and check if your gear shifting has improved or not. Keep adjusting as needed until you achieve the proper tension setting.
Step 6: Find and Adjust The Limiting Screw
If you are still struggling to get the gears to shift correctly, you may need to adjust the limiting screw. To find this, look on the top of the derailleur for a screw marked with an “H.” This indicates the adjustment for the high gear. While not all bikes may have this screw labeled like this, many of them do.
Loosening this screw may allow the chain to reach the smallest cog and shift through the gears properly. If this doesn’t work, then it may be the chain itself that has stretched. Which takes me to the next cause of bike gears slipping…
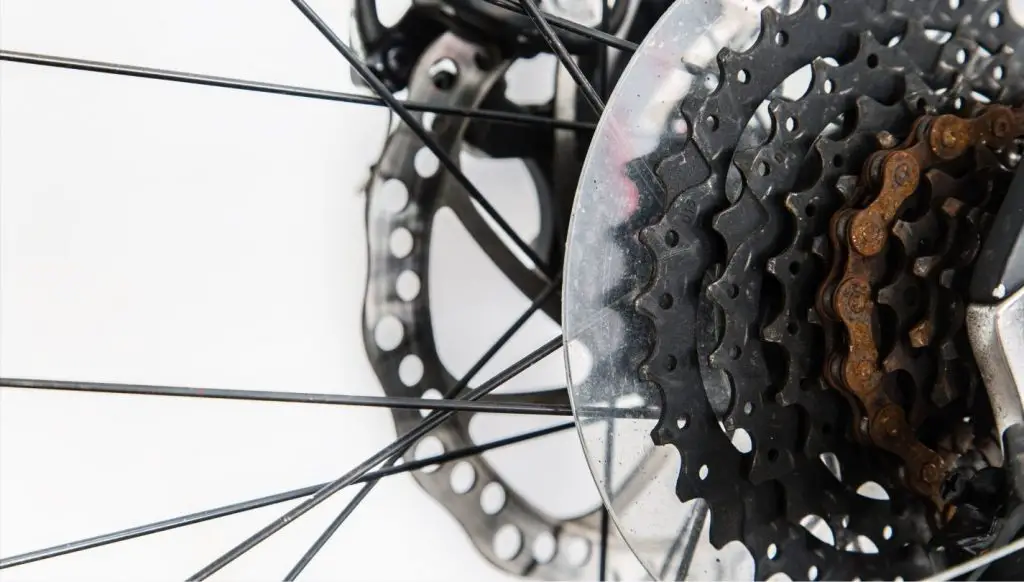
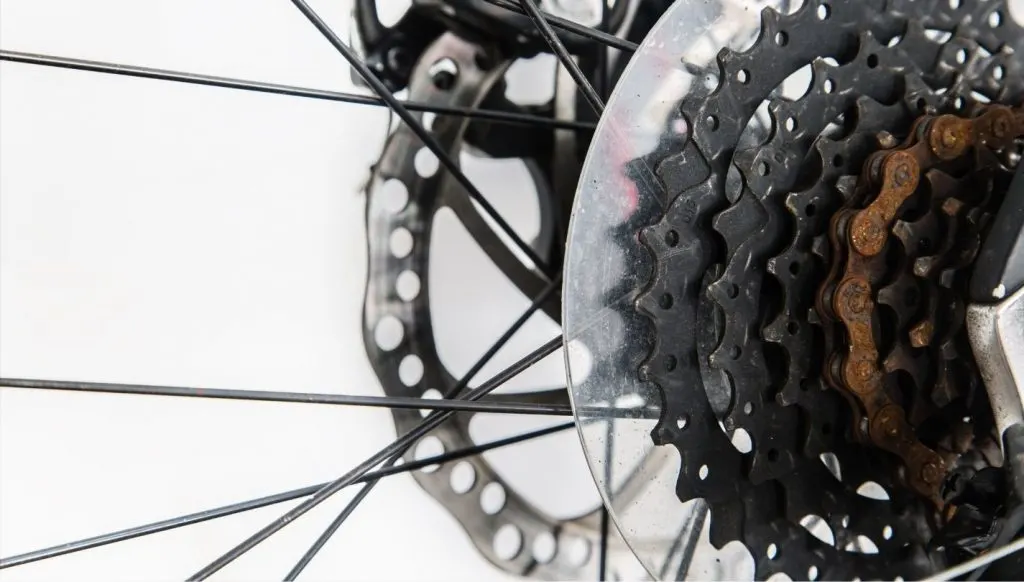
Cause #2: The Chain Has Stretched Or Is Worn
If none of the above remedies work, then it is possible that your chain has stretched, causing the lack of tension and resultant gear slippage. In this case, you can remove a link from the chain and then check to see if that fixes the gear slipping.
By removing a few excess links, you could solve the problem with little or no cost. If you are going to do this, then check the chain for wear and tear.
You may find that the chain is also worn. The rollers will lose their standard rounded shape, and the chain-plates will have stretched. This will cause the chain to lose good contact with the sprocket, especially under hard pedaling.
If your chain has indeed stretched and shows signs of wear, replace it immediately to avoid damage to the chain-rings, sprockets, and cassette.
Cause #3: Your Gear Cables Aren’t Moving Properly
If the gear cables are not moving freely, some dirt or grit may prevent them from doing so. Holding the shifter, put your fingers on the cable and see if you can feel it moving as you shift gears.
If it is, then the issue is not there – if it’s not, then you need to do a closer inspection of the cables and perhaps add a little grease or lube to the gear tube to free it up.
Your cables need to have as little drag on them as possible. So kinks, rust, and age can all contribute to additional friction during shifting.
Always try and use the best quality cables you can, as these are designed for robust high performance and will give you good service, easy and accurate shifting, and headache-free riding.
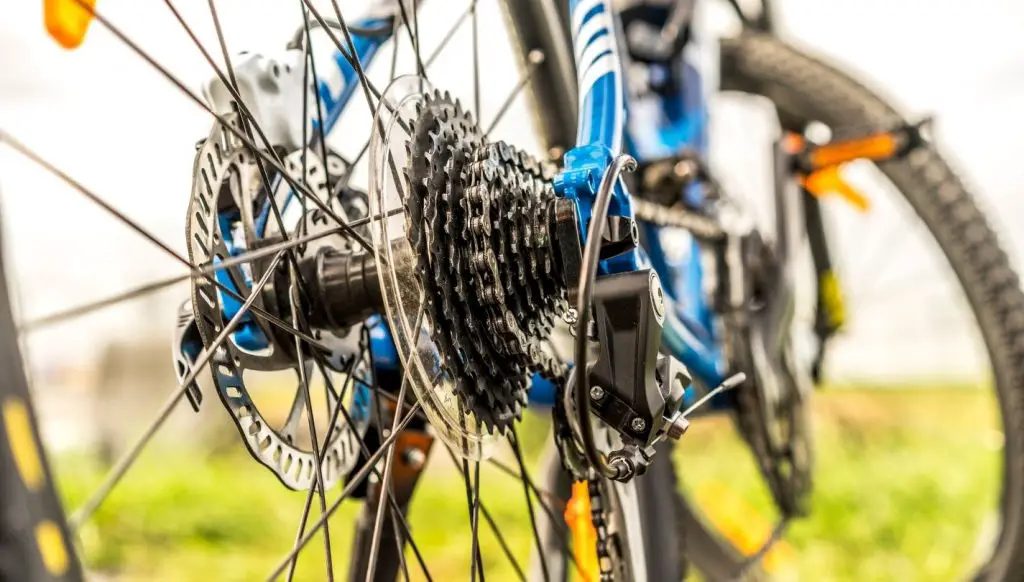
Cause #4: Your Sprockets May Be Worn
As you ride, your sprockets accumulate wear and tear from riding. Dirt and other microparticles on the chain cause the sprocket teeth to wear down. This will cause the chain to not sit securely on the sprocket when selected.
With your bike on the stand or standing up, check the sprockets for wear. You will see this as the teeth are no longer as sharp as they once were, and the teeth’ edges are blunted or worn.
If you see any of these signs, it may well be time to replace the cassette.
Cause #5: Rear Derailleur Misalignment or Damage
If you have crashed, you may find that the derailleur has been damaged or moved out of alignment or that the derailleur hanger is bent. These will all cause the gears to skip.
Check the alignment of the derailleur to see that it is in line with the sprockets on the wheel or if the hanger is bent.
If you can see that it isn’t aligned or that the hanger is indeed bent, then it’s time to take the bike to your mechanic to get it sorted out. It’s not advisable to do this as a DIY fix, as you need the proper technical knowledge to repair this in a safe way.
Cause #6: Front Derailleur Adjustment
If your bike is not shifting on the front chain-ring, this may result from that derailleur requiring some adjustment. Fortunately, the front derailleur is not nearly as moody and temperamental as the rear, so the adjustment process is much more straightforward!
The front derailleur needs to align parallel with the chainrings, and when this alignment is out, it can cause slippage. Check to see if the hanger is directly over the chainrings and if it isn’t; you can easily bend it back into shape.
Shift your bike to its lowest gear and see if the front derailleur is in line with the smallest chainring. If it’s not, you may need to adjust the limiting screw, or perhaps the cable is too tight.
If your bike has quick twist adjustment on the levers, you can adjust the cable tension there; if not, you may need to loosen the bolt on the front derailleur and adjust from there.
Reason #7: Dirty Gear Components
Sometimes the gears slipping can be caused by dirt and grease in the drivetrain. Give your bike a good clean and make sure the shifters, cables, cassettes, sprockets,hangers, and derailleurs themselves are free and clear from dust and dirt.
For more information on regular bike maintenance, check out my guide here for a full breakdown of what you need to do to keep your bike in top condition.
Another cause of gunk on your shifters and cables is the sugar electrolyte drinks riders use when riding. After your ride, give your cable guide a clean and remove any build-up you may find there.
These are some of the main reasons that cause slipping of gears while riding, but there are a few other less common causes too. And although not commonplace, if all other attempts have failed, then perhaps the following could be the cause…
Some Other Reasons Your Why Your Bike Gears Could Slip
Your Drive-train Components Aren’t Compatible
When replacing any component in your drivetrain, you need to be sure they are compatible with the existing components. You’ll end up with derailleurs, cassettes, chains, and sprockets, all speaking a different language to each other, and this can cause problems.
Ensure that you check the manufacturer’s specs on replacement components to ensure that they will work smoothly with your existing drivetrain.
There is Too Much Lube on the Bike!
There are some situations where too much lube is not a problem, but with bicycle gear systems, it can be. This is because an excess of lube will cause the chain to slip over the cog teeth, especially if the chain is starting to wear out. If the cog teeth are also worn, an excess of lube on the chain will make biting onto the cog teeth even more unreliable.
To fix this, wipe or remove any excess lube from the chain and cycle the chain around a few times, wiping off the lube after each cycle.
Poor Quality Shifters Can Cause Inconsistent Performance
In some cases, lower-quality shifters can cause the gears to slip as they may not maintain the tension in gear or under heavy pedaling. Phantom shifting may also occur where any of the problems described above are in play.
If your bike wasn’t a high-end one, you’ve bought it second-hand, or you’ve added budget shifters to save some money on a replacement, you may want to invest in better-quality ones.
Once you have gone through all the steps above and are still having the gear slip issues, you can check to see if the shifters are holding the tension by feeling if the cable moves away from or toward the shifter when the bike is in gear.
This will give you an indication if the shifter is the problem or not.
Poor Frame Design Causes Cable Friction
Believe it or not, gear slipping or poor shifting could result from the frame design and cable layout. Some of the older bikes have internal routers, leading to excessively tight bends or cable sheaths that add drag to the cable as it moves.
Because of their inaccessibility within the frame, these cables are not easily replaced and not checked and replaced as often as they should be.
Speaking of the frame, sometimes a cracked frame can also be the culprit, so if you have crashed or perhaps not laid your bike down as gently as you should have, it may be a good idea to check your frame for cracks.
Under heavy pedaling, the frame can twist, causing the gear cables to tighten or loosen, and this would cause gears to slip.
Conclusion
With any problem around your gears slipping, it’s preferable to start with the most common and apparent causes, as these can often be sorted out without cost.
If you find that despite your best efforts in diagnosis and adjustments, your gears are still slipping, then it may be good to consult your bike mechanic to get back in the saddle, knowing your gear issues are a thing of the past!