
If you’re planning on riding a bike, you’ll need to make sure that you have the right tools. This will ensure that you’ll be able to maintain your bike, keeping it in good condition. But what are the best bike tools?
Some of these essential tools include:
- tire pump
- bike stand
- Allen key
- tube repair kit
- cable cutter
- shock pump
Let’s look at the top 25 to add to your collection today!
#1: Tire Pump
The pump is one of the most well-known bike tools. It helps regulate the amount of air in the tires.
When the tires have the right amount of air the bike is easier to ride, so it’s recommended that you get a reliable pump and check the tires frequently. For example, this tire pump on Amazon is great value.
The first thing that you’ll need to determine is the type of inlet valve that your bike has. There are typically two options for you to choose from, either the Presta or a Schrader.
The Schrader valve is like the one that’s found on car tires. The Presta valve is longer and thinner. In some cases, you might be able to find a pump that offers both of these connections.
Once you know what type of inlet valve to use, you’ll be able to decide what type of pump to get. This will often depend on your personal style. For example, some people might like a floor pump.
You can get a long pump hose to connect to your bike. Often, you’ll be able to stand on a platform, using your arms to operate the pump. Some people find that the gauges on these types of pumps are easier to read and easy to operate. The floor pump is one of the most popular models on the market.
Another popular option is a foot pump, which can be purchased on Amazon here. This is a more compact alternative to a floor pump. As you’ve probably guessed, you operate the pump using your foot. I personally prefer to use this kind of pump because I find it easier and less fiddly.
A foot pump also comes with a long flexible cord, which you’ll need to attach to the bike. However, the gauges will be low to the ground, which can make it a little harder to read.
A third type of pump to consider is a mini pump, which can also be bought on Amazon here. These are some of the lightest pumps. It looks like a long, thin tube with one end connecting to the tire. On the end other is the pump handle.
It can take more effort and time to inflate a tire with a mini pump. But they are one of the most compact options, so it’s really handy if you want to be carrying a minimum amount of stuff with when cycling. Most riders will have one of these devices in their kit bag, as they can be invaluable on a longer ride.
Finally, you might want to consider a CO2 inflator, (here’s an example of one on Amazon). These are the smallest devices, often able to fit into your pocket and are very popular amongst more experienced riders.
If your tire pressure is getting low, you’ll be able to put the pump inlet over the tire. Then, release the CO2 gas, and inflate it to the right pressure almost instantly. The only potential downside is that, if you run out of gas in the cartridge, the inflator won’t work.
#2: Lubricants
Another piece of equipment to consider is chain lube. I absolutely love this brand sold on Amazon. It’s important to take adequate care of your bicycle chain. Using a chain lube will reduce friction and prevent the chain from wearing out prematurely. It also makes pedaling smoother.
How often to apply the chain lube will vary, depending on how often you ride. For example, if you are planning on riding for 30 miles per day in good conditions, apply lube about every two weeks. A 20-minute ride in wet weather will wash away the lube and you’ll need to reapply.
TIP: As a general rule, when you can see that the cracks in the chain don’t have any lube.
While it’s important to keep the chain lubricated, it isn’t the only part that requires attention. For example, you’ll need to lubricate under the saddle post.
You might also need to use some grease, (Amazon link), on the threads of the screws. It is thicker, preventing it from getting washed away. It’s best to apply the grease with a gun for precision and to keep your hands clean.
A third option that you might want to explore is a spray-on lubricant like this one found on Amazon. These come in a can and will usually have a thin nozzle so you can get into difficult-to-reach places.
NOTE: Each of these different types of lubricants will work together nicely.
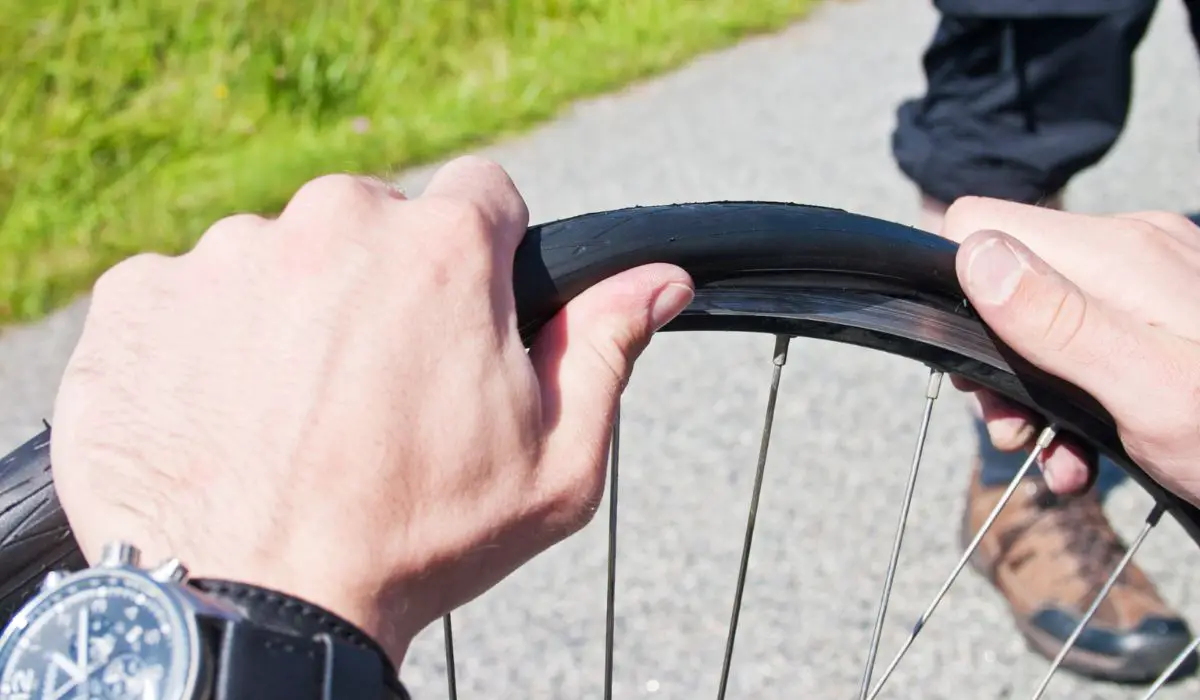
#3: Tire Levers
Another important tool to consider purchasing is a tire lever, easily available from many bike shops. I like these tire levers from Amazon as they are solid and will last for as long as you’ll need them. When you have a flat tire, or you need to install a replacement, use a tire lever to make it easy to remove the tires from your bike. It’s often best to get a metal lever, they are stronger and more durable than plastic levers.
A tire lever is easy to operate. There is a skinny end that goes between the tire and the rim. Then, enough pressure can be applied to pop the tire off.
Then you can repair or replace the tire. The set will often come with a few levers. This can be useful for tighter tire fits, which you might need to use multiple levers to remove.

#4: Bike Stand
When you are in a race, it’s fine to flip the bike over and make some fast repairs or adjustments. But when you get back home, you’ll want to do a more thorough job.
TIP: This is easier if you have a good bike stand so the bike is at eye level, and you can clearly see what you are doing.
There are plenty of bike stands available for you to choose from. To find the best one for you, there are a few things to consider.
First, think about the amount of space you have available. Can you leave the bike stand assembled all the time, or will you want one that can fold away?
It’s a good idea to get something portable, so you can take it outside if the repair is messy. I like this one on Amazon as it’s durable, foldable, and not too bulky, so it ticks all the boxes.
#5: Needle-nose Pliers
When you’re working on a bike, it’s common for you to come across small components. They need to be handled with care.
Needle-nose pliers, like this pair on Amazon, are perfect for these delicate procedures.
TIP: There are plenty of times when you will use needle-nose pliers, so it is a good idea to pay a little more to purchase a strong set of pliers.
#6: Allen Key
In order to take care of your bike, you’ll need to have a good set of Allen keys, sometimes called Allen wrenches. These are essential for attaching and detaching certain pieces of equipment.
Almost every bike will have some pieces of equipment that will require an Allen key to adjust or tighten.
Since you will use it so often, make sure that you get a good set with versatility. Look for some like these Allen keys on Amazon that:
- has a wide array of sizes
- are made from a strong material, like metal
- an L-shape
#7: Screwdriver
Another important tool that you’ll need to use during maintenance is a screwdriver. This can be used to:
- remove
- change
- adjust parts
Like with the Allen keys, it’s wise to get a large set of screwdrivers (Amazon link), so you have plenty of sizes to choose from.
Make sure to get both flathead and Phillips’s head. It’s also best to choose one that is made from metal, so the tools will last for a long time.
#8: Tube Repair Kit
If you ride your bike regularly, you will get a puncture at some point, which can be a major inconvenience. Usually, they can be patched up on the road.
A tube repair kit is one of the best ways to do this. They have everything needed to make a temporary fix. These kits are very light, and you can tape them to the bike frame or put them into your pocket.
What’s included in the kit can vary. Generally, you’ll be able to find a kit that comes with:
- glue
- patches
- a mini pump
This is everything needed to fix the issue in a few minutes, so you can get on with riding. When you get back home you can look at the problem and decide whether or not it’s worth replacing the tire.


#9: Chain Brush
One of the most important tools to include is a chain brush, like this on Amazon. This forms a crucial part of a maintenance routine.
When you’re riding, it’s common for the bike to get dirty with:
- mud
- dust
- dirt
If it stays there, it can impact your performance and shorten the lifespan of the chain.
Thankfully, there is a simple solution to this problem. You can use a chain brush which will get rid of the dirt that has gathered on the bike. In most cases, a chain brush kit will come with a range of brushes.
This will let you pick the perfect brush for all parts of the bike. If you have some stuck-on dirt, mix up a solution of soapy water to help dislodge any loose sediment or debris.
#10: Multi-Tool
When you’re riding, you might want to have a multi-tool with you, like this one on Amazon, to be prepared to do some quick repairs. These are very useful, as well as:
- small
- light
- compact
Use it to help:
- patch a tire
- tighten a bolt
- make a quick adjustment
Since they are so small, you’ll be able to slip them into your saddlebag.
When choosing a multi-tool, look at the elements that it offers. Each element should be potentially useful.
It’s also important to pick something that is made from a strong material. Metal is often the best choice, to ensure that the tool will be durable.
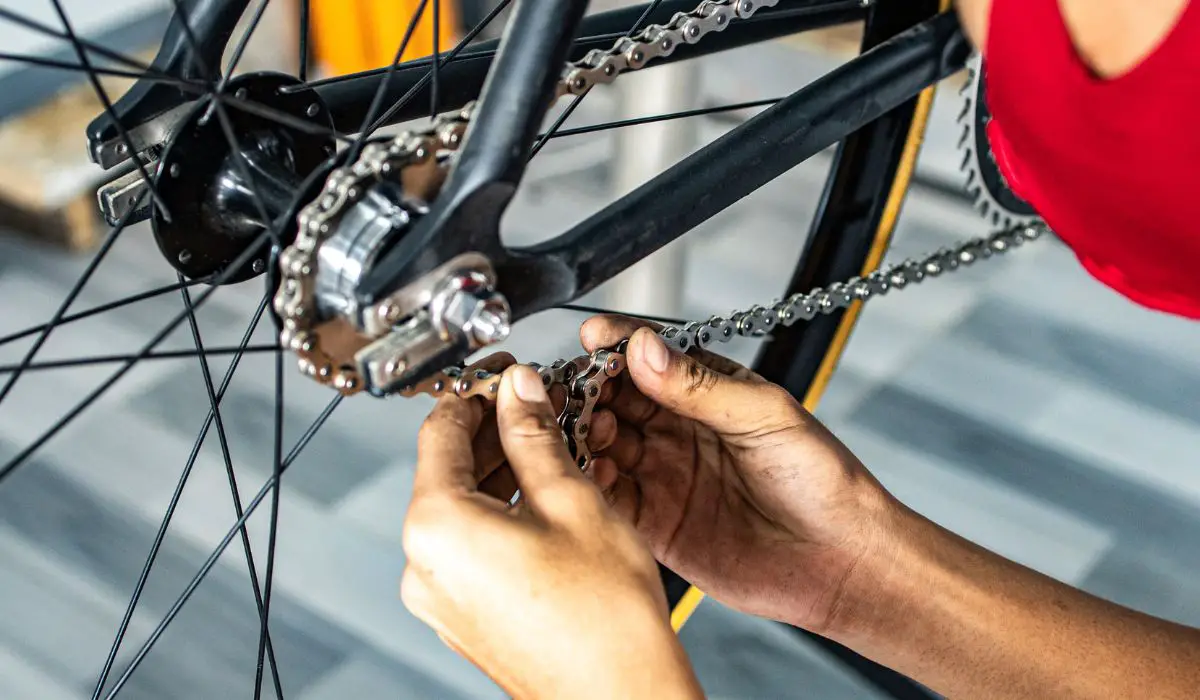
#11: Chain Whip
You might also want to consider getting a chain whip, such as this one on Amazon. This tool can play a very important role, making it easy for you to remove and replace the chain.
Use it to remove the cassette too. This is one of the most important maintenance activities that you’ll need to do. How often you’ll need to replace the chains and cassettes will depend on how frequently you ride.
TIP: It’s usually recommended that you replace the cassette when the chain reaches 75 percent wear.
Find a chain whip made with strong materials, preferably metal. This will be strong enough to remove the cassette.
In some cases, you might find a whip with a pedal wrench at the top. This can be extra useful, helping to loosen the bolts around the chains. If not, don’t fret, you can buy these separately.
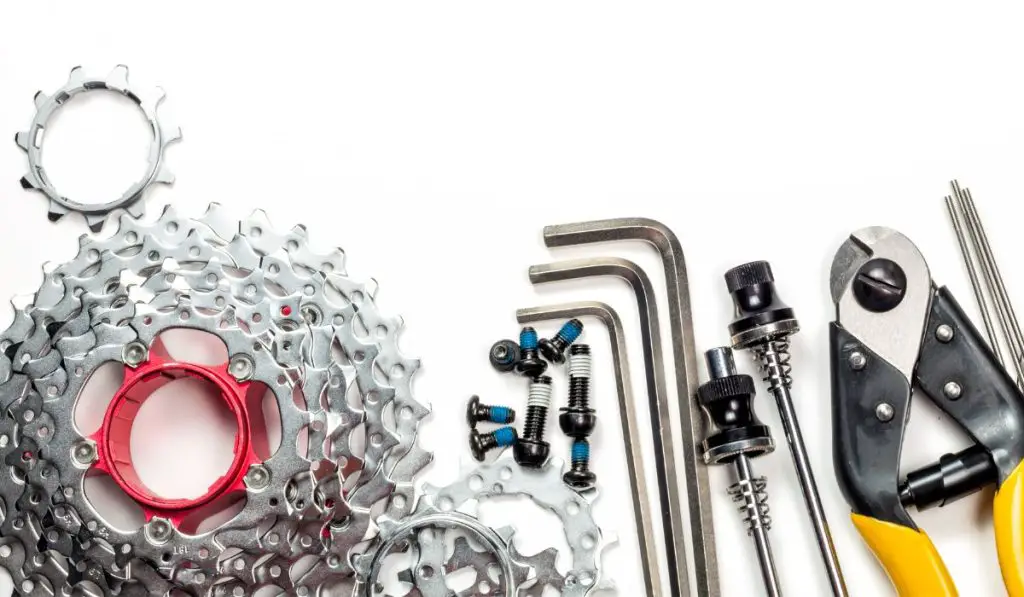
#12: Cassette Lock Tool
Once you’ve got a good chain whip, turn your attention to finding a good cassette lock tool. This is what you will use to loosen and undo the cassette.
This tool is essential if you’re planning on changing or adjusting your cassette.
#13: Cable Cutter
Another useful tool is a cable cutter (Amazon link). This tool comes in handy very often.
For example, you’ll be able to use it to:
- cut through zip ties
- get through the cable housing
- crimp the wires together
You might also want to consider getting a cable puller. This holds the cables in place while you position them. When finished, tighten up the clamp bolt, holding the cable in place.

#14: Chain Wear Gauge
The chain is one of the most important parts of your break. If it snaps while you’re riding, it has the potential to do some serious damage.
Know when it’s time to replace them. One of the best ways to figure this out accurately is to use a chain wear gauge, found on Amazon. It doesn’t matter what type of chain wear gauge you use. Generally, it depends on personal preference.
This is a very simple tool to use. First, remove the chain from the bike.
Then, place it flat on the table. To perform the CC-3.2 method, use the 0.5 side of the chain wear gauge first. Place this end of the hook into the chain.
Then, try to fit the other end in. If it doesn’t go in, the chain isn’t yet 0.5 percent worn. If it does go in, repeat the procedure with the 0.75 side.
If it still goes in, the chain is more than 75 percent worn and should be replaced.
You can also use the CC-2 method. Place the front between the inner chain and the back between the chain studs. Press on the gauge, taking the tension out of the chain.
Be careful to avoid making the chain too tight. Once you’re finished, look at the gauge. It will display a reading, telling you how worn the chain is.
Then, decide whether or not you want to replace it.
#15: Torque Wrench
A torque wrench (Amazon link), is slightly different from a normal wrench. It helps you control how much tension you apply to the bolt.
This tool prevents you from accidentally overtightening, which can damage some components. This is especially important if you’re planning to work on delicate components.
It’s also good for light components, like carbon fiber parts.
#16: Spoke Wrench
When you’re maintaining the bike, it’s essential to look after the wheels. If they get out of alignment, you’ll need to bring in the spoke wrench, try this set from Amazon.
This can be a great tool. But, before you start using it, you might want to practice on some spare wheels. There tends to be a bit of a learning curve associated with the spoke wrench. You might need to destroy some tires before you learn how to use them properly.
There are multiple sizes of spoke wrenches. Pick the right one for your bike depending on the size of the tires.
NOTE: If you have multiple bikes, you might want to purchase a multi-size spoke wrench.
#17: Chain Tool
When you’re maintaining your bike, be prepared to put on a chain or take one on and off. One of the easiest ways to do this is to use a chain tool, like this one on Amazon. These will make the process simple.
These tools tend to be very small and lightweight, so you can easily add them to your saddlebag. This will ensure that you’re prepared if you run into any issues during your ride.
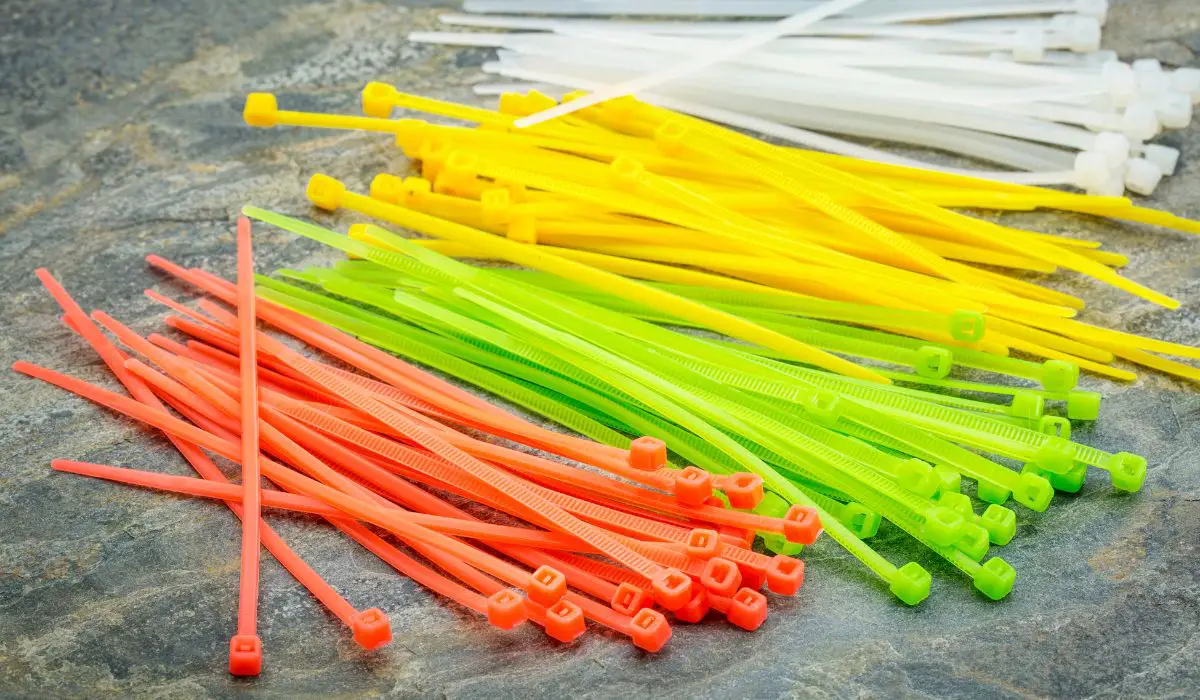

#18: Zip Ties
When you’re working, you’ll often need to hold things in place. After all, you only have two hands! You can use a locking wrench to do this. But the easiest solution is to use a zip tie, like this affordable pack on Amazon. You’ll be able to lock everything in place.
Once you’re done, cut them loose. Get several sizes of zip ties, so you’ll be able to deal with all types of components.
#19: Pedal Wrench
When maintaining your bike, you’ll need to be able to take the pedals on and off with ease. Check them occasionally, and tighten them up. You’ll need to use a specific wrench for this, known as a pedal wrench, which you can purchase on Amazon here.
In most cases, the pedal wrench will need to be 15mm. However, you might need to purchase a smaller size for your bike, so measure before you buy.
#20: Microfiber Rags
When you’re working, you’ll often need to deal with spills and messes. To keep your workstation clean, a supply of rags comes in really handy.
Microfiber rags like these (Amazon link) work perfectly. They’re absorbent, and when you wipe them on the frame they won’t leave a streak, so your bike is always looking at its best.
NOTE: These rags can go through the wash, making them easily reusable.
#21: Degreaser
Bicycle lubricants are designed to be waterproof. This is perfect when you’re riding, ensuring that you don’t need to worry about the rain. However, when you get back to the garage, this turns from a blessing to a curse. It is difficult to remove, threatening to coat all your equipment.
Fortunately, there is a simple solution to this problem. Put some degreaser onto an old rag. This is designed to break down the other products, allowing you to wipe them off.
TIP: This is great for the bike parts, but you can use it for your tools as well.
Gloves will protect your hands from the muck and grease that comes with maintenance. Though this won’t be to everyone’s liking, they are at least worth considering.
#22: 3-Way Wrenches
A 3-way wrench can be a great way of dealing with hex bolts. These have an iconic Y-shape. This tool presents a few key advantages.
First, it is easy to hold and operate. With three sizes of hex bolts, you’ll always have the right size for the job at hand. The 4, 5, and 6-mm hex bolts tend to be the most useful, though you can get a wide range of sizes. You can also get a hex bolt for socket wrenches.
#23: Scribe
The scribe is a highly versatile tool. Use it to:
- poke through small holes, getting rid of dirt
- scrape across metal sections, to test if they are rusting
- check if there is any pitting
While a scribe can be a great tool, you don’t need to have one. You can perform many of these functions using a toothpick, but they aren’t reusable. Check out this scribe on Amazon if you are interested.
#24: Shock Pump
There are a few types of shocks that can be fitted to bikes. If you have air brakes, you might want to use a shock pump like this one on Amazon.
This tool will let you check that the suspension is at the right pressure, and add more air if necessary.
Depending on the type of fork that you purchase, it might be included. If not, you’ll need to buy one separately.
TIP: Try to find one that has a tight seal. You don’t want any air to be released when the seal is disengaged.


#25: Repair Books
If you’re planning on doing your own repair work, it’s important to know the correct procedure. One of the best resources is a book on repairs.
TIP: These books are filled with tips and tricks. Look for one that has plenty of illustrations.
Another resource that you can tap into is online articles. There are dozens of these available for free. Try to stick to those that come from a reliable source. Some people might prefer to watch tutorials, to see how the procedure is being performed.
Final Thoughts
Maintaining the bike yourself can be a great way to save money. Often, spending a few hours each month will be enough to keep your bike in excellent condition.
As we’ve seen, you don’t need a lot of tools. These 25 picks will be enough to allow you to do nearly all the maintenance jobs your bike needs.
Remember that if you aren’t confident or you want to do something very complex, visit a bike shop. Sometimes, the right decision is to leave the job to the professionals. So, use these tips to stock up on everything you need to take care of your bike.
You might also be interested in: