
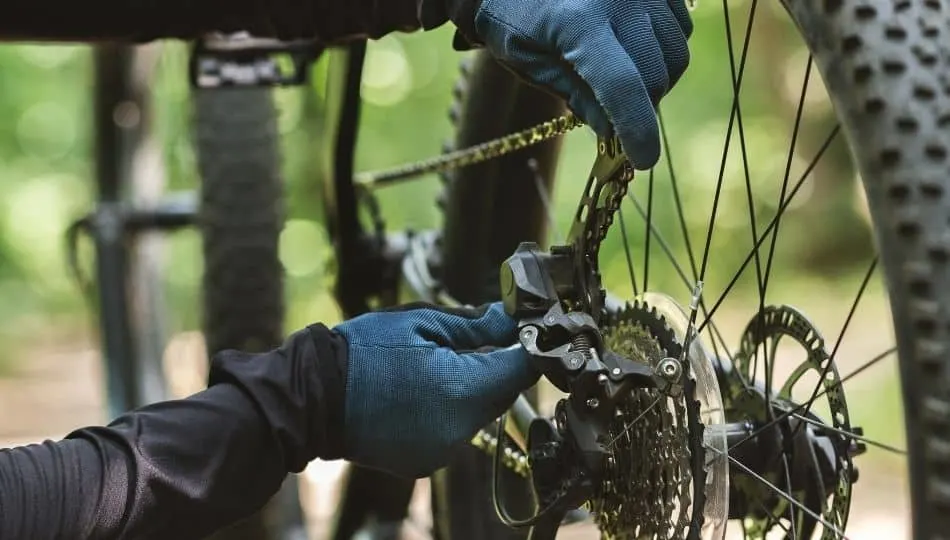
Your bicycle tool kit usually becomes full over time, but as a beginner, you don’t usually equip your tool kit with absolutely everything you’ll ever need. This includes the specialized tool you need to change a bike chain. So, if you need to change your bike chain, but don’t have a specialized tool, here how you ca get the job done…
If you don’t have a specialized chain tool available, it is possible to change your bike chain using pliers, a nut and a hammer, and following these steps:
- Identifying and removing the master link
- Identifying and removing the chain link
- Replacing a chain
- Cleaning and reattaching a chain to your bicycle
- Maintaining your bicycle chain
Continue reading for a detailed step-by-step guide to changing your bicycle chain without any specialized tools…
How to Change a Bike Chain without Specialized Tools
Bike Chain Parts & Household Tools You’ll Need
While this method does not require the use of specialized tools, it does require some items from your common household toolbox. Listed below are the everyday household tools you will need to change your bicycle chain without a specialized tool.
- New Chain
Bike speed is based on the type of chain. This means that if you own a 7-speed bike, you will need a 7-speed chain. Note that higher speed chains are most likely made from stainless steel or have some sort of special coating that delays rusting.
- Replacement Pin or Master Link
Newer chains usually include one of the following; a new pin or a master link, a special link that connects both ends of your chain. If your current chain does not include a new pin nor a master link, these components are purchasable online for a replacement. When browsing for these parts, ensure that it is compatible with the brand of your bicycle chain and your chain speed.
- Pliers
The size of your pliers should be sufficient to securely hold your bicycle chain.
- Nut
- Hammer
- Gloves (optional)
Chain replacement can make your hands dirty or grimy; gloves not only keep your hands clean, but they also protect your hands from sharp objects and materials you are working with.
When browsing for these parts, ensure that it is compatible with the brand of your bicycle chain and your chain speed.
How to Remove Your Old Bicycle Chain
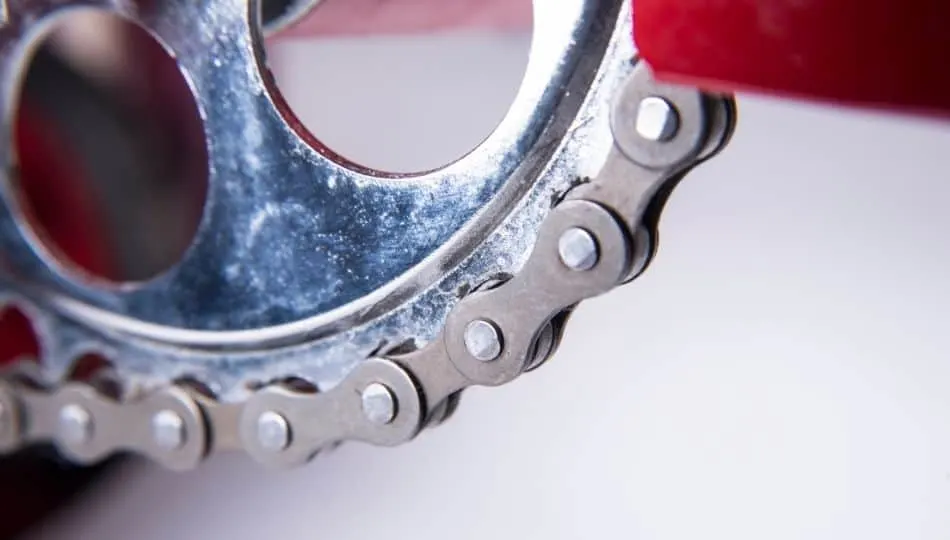
Identify your master link in your bicycle chain and break your chain. Generally, the master link and its pins are in a slightly different color than the rest of your links. For example, a brass-colored chain may have a black-colored master link.
- With your pliers grasp the master link and push the pliers inward; this allows you to remove the master link from the chain plate.
- You then need to use the nut, the pin, and the hammer to break off the bicycle chain from the bicycle.
- Place your chain’s master link over the nut; ensure that the chain pin of your master link is placed perfectly over the hole of the nut.
- With a hammer, hit the pin’s sharp edge. This will allow the pin to easily fall out from your chain plate.
Fitting the New Bicycle Chain
Refitting the new bicycle chain onto your bicycle without the use of a chain tool:
- Wrap your new bicycle chain around your bicycle’s chain wheel
- Weave your chain through your bicycle’s front derailleur and back around the rear cassette
- Wrap your bicycle chain around the smallest cog on your bicycle
Note: make sure that your chain does not dangle from the front
Connecting the New Bicycle Chain
You must reattach the bicycle chain to your bicycle:
- Before reattaching, make sure that your bicycle chain is dry. This must be regulated to ensure your bicycle’s performance
- Use a wire or a section of a coat hanger to hold up the disconnected chain. This will allow the bicycle chain to have enough slack for reconnection.
- Weave the ends of your wire in a way that it holds up the chain
- Reconnect the chain via the master link. If you do not have a master link, insert the rivet into your bicycle chain to reconnect it.
How to Change Your Bike Chain Using Specialized Tools
In the case that you have the sufficient tools with you, I have also written a guide on how to do so with them. Replacing your bicycle chain when the specialized tools are at hand makes the task much simpler. However, there are still quite a few steps to follow.
Bicycle Chain Parts & Tools You’ll Need

Before performing maintenance on your bicycle chain, gather the required tools listed below. Not all of these tools are required and some may substitute others.
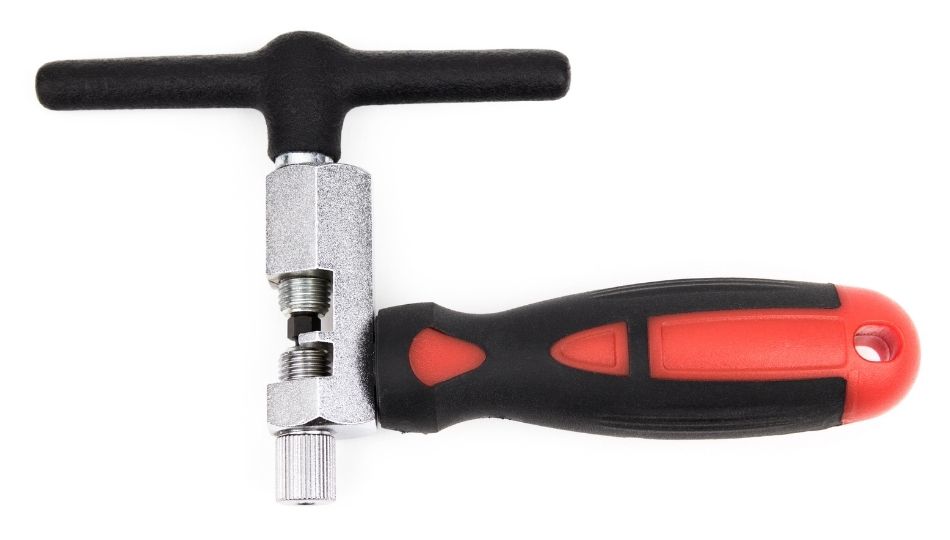
- Chain Tool
Every link of a bike chain is held by a steel pin. Having a chain tool that is compatible with the links allows you to remove or attach links by pushing in or out the pins.
- Chain Wear Tool
A chain wear tool is a piece of metal that indicates how worn your chain is through measurement. A new chain should be 12 inches from the middle of a pin to the middle of another pin that is 12 links away. It is possible to use a ruler/measuring tape to measure, but those tools may give inaccurate readings.
- Master Link Pliers
If your bike chain has a master link (a special link), these pliers will definitely ease the process of removing and attaching the master link. Regular pliers could be used as well.
- New Chain
- Replacement Pin or Master Link
There’s a handy kit available at Amazon that contains all the above mentioned tools, and you can find it here.
How To Remove Your Old Bicycle Chain
In order to do this, you must first disconnect your existing chain; usually, this is known as “breaking the chain”. Pay attention here! The method you use is based on whether or not your original chain uses a master link.
Before beginning to remove your old bicycle chain, shift your bicycle to the smallest chainring and cog. You can do this by changing your gear to the highest gear. If at all possible, you should also remove the chain on your bicycle from its front chainring or remove the rear wheel from your bicycle. While this step is not mandatory when removing your chain from your bicycle, it makes the job much easier. This step removes the tension within the chain, making it slack.
If your bicycle chain is standard, meaning it does not include a master link…
- Rest your bicycle chain inside your bicycle chain tool, allowing the chain tool’s pin to align with a singular pin in your bicycle chain
- Rotate the bicycle chain tool’s handle
- Eventually, the pin will be pushed out enough for you to break your bicycle chain
If your bicycle chain includes a master link…
- First, locate the master link; this link looks significantly different when viewing it from the side. As stated above, it is also usually a slightly different colour than the rest of the bicycle chain. You must break the chain at the master link.
- The master link has a pin on each side of the link. Use your master link plier to force both the pins against one another. By doing so, you can now open the link.
Determining the Length of Your New Bicycle Chain
When purchasing a new chain for your bicycle, there are many options. Some may be too long for your specific bicycle size. Thus, you must first shorten the chain to fit your bicycle. It is important to ensure that the remaining ends will connect before removing the extra links. There are a few ways to do this…
- Compare your new chain to your old chain. This is the simplest method. For a rough estimate, lay each chain side by side. For an accurate comparison, count the number of links to remove from the new chain to match the old one. Remove links using the chain tool.
- Thread the chain through the front derailleur and fit it into the two largest chain rings, the front and the rear, without threading it through the rear derailleur. Join the two ends of the chain together and pull them as tight as you can. The length you are looking for is the point when the chain meets with an additional overlap of two links.
Fitting the New Bicycle Chain
- You will first need to fit the chain through the rear derailleur on the bike. To do so, shift your bicycle to the lowest gear; this shifts your bicycle’s largest chainring and cog. In the case that you have a clutch mechanism, release it as well.
- Navigate your new bicycle chain through the mechanism and around your outer chainring.
- Thread one end of the chain through the front derailleur and rest the other end inside the seat stay, over the cassette.
- Push down the rear derailleur to thread the chain around the upper and lower jockey wheels on the rear derailleur.
- Release the derailleur.
Connecting the New Bicycle Chain

Like removing your old bicycle chain, there are different methods based on whether or not you decide to use a master link. Read carefully!
If your new bicycle chain uses only chain pins…
- Use your chain tool to reconnect your new chain with its chain pin; a new chain pin should be included in your purchase.
- If, instead, you are simply repairing your old bicycle chain, you should still replace your old chain pin with a new one (remember to make sure that the new chain pin is compatible with your old chain).
- Insert the chain pin halfway through your chain using a chain tool and snap off the excess material with pliers.
If your new bicycle chain uses a master link…
- Place half of the master link in each end of your new bicycle chain.
- You can then assemble the new bicycle chain by retracting the ends together and then forcing the master link into place with your master link tool.
How to Maintain Your Bike Chain
Conducting regular maintenance on your bicycle’s chain is key to ensuring your bicycle’s peak performance. In doing so, you also allow your bike to shift gears in an easier manner and your drivetrain to last longer.
If you do not regularly maintain your bicycle chains, you sign yourself up for inefficient and noisy cycling due to significantly greater chain wear, reduced flexibility of chain links, diminishing gear shifts, and in the long term, permanent damage to your bicycle. So, how do you perform maintenance on your bicycle chain? It is not as complicated as it sounds.
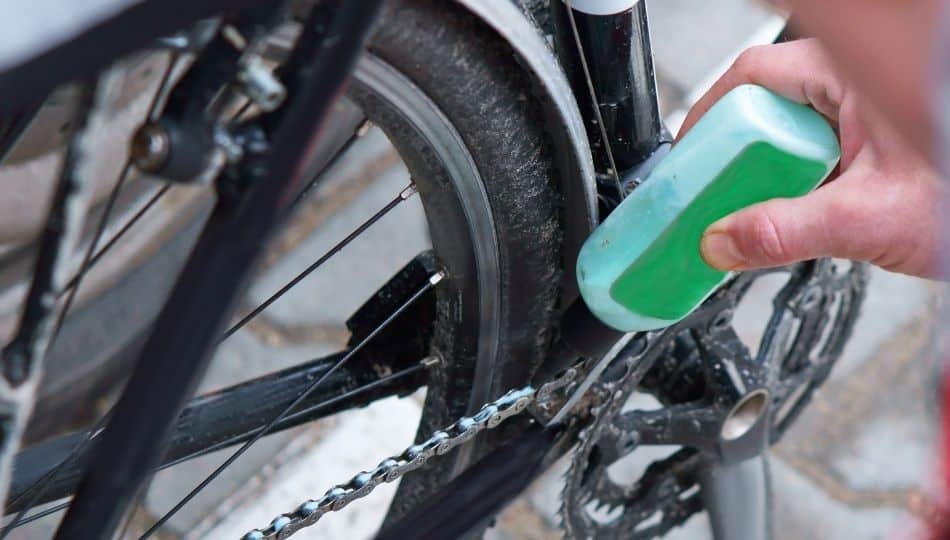
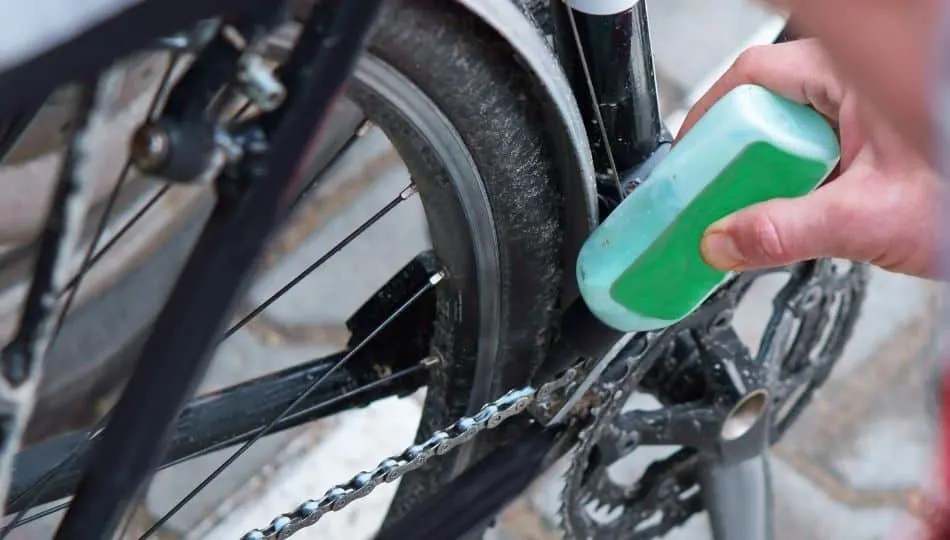
The easiest way to maintain your chain’s condition is to regularly clean and lube it; this essentially slows down the wear-and-tear and the physical depreciation of the component. This also prevents the build-up of dirt, grime, dust, and other debris.
You can easily do this by using a degreaser and cloth for regular maintenance or you can use a chain-cleaning device for a thorough cleaning. If possible you could even brush each link with a brush or toothbrush to remove hard-to-reach debris.
After cleaning, leave the degreaser to dry. After doing so, add small amounts of lube onto the chain, applying even amounts to each link. When the lube dries, you can easily remove the excess lube with a dry cloth; this is an important step. If omitted, more debris will attach to the protruding lube in the future.
If you’d like step by step instructions on how to keep your bicycle chain in peak condition, check out my article here.
It would also be wise to check if your gears are in great condition while you’re doing chain maintenance. Here’s an article I wrote about adjusting your bike gears.
How Often Should I Perform Maintenance on my Bicycle?
The most important thing to do is to regularly inspect your bicycle’s chains and individual links. This can easily be done by lifting your bicycle’s rear wheel off the ground and slowly rotating your pedals forward and backward.
At this time, you are looking for the build-up of debris, abnormally functioning links (links that do not easily pass through the curves of the derailleur), and rust. You should also be listening for odd noises when the chain rotates. If any of the above occurs, clean and lubricate your bicycle chain. In short, there are two general rules you should follow…
- Lubricate your chain when it makes noise.
“Dry” chains usually make a lot of noise when cycling. You won’t miss it. This usually takes the form of a loud “clacking” or squeaking noise.
- Lubricate your chain after riding in the rain or snow
Leaving your chain unattended after riding in wet weather conditions causes rust to form in the long-term. Cleaning and lubricating it prevents this from happening.
It is also strongly recommended that every few months or half a year, use a chain removal tool to release your chain. Then, submerge your bicycle chain in a chain solvent, which removes debris that cannot be removed by hand. Remember to completely dry the chain afterwards; ensure that the substance has fully evaporated before lubrication and re-installation.
Check out my article here, on how to properly maintain your bike to keep running smoothly and lasting longer.
What Type of Bicycle Lubricant Should I Use?
While there is no superior brand in the world of bicycle maintenance, ensure that you are purchasing from a reliable source. Do not use any substitutes that you think will do the job. Bicycle lubricant is made especially for bicycles and bicycles only.
Substances that are clearly labelled as a bicycle-specific product will undeniably perform better than products that are not labelled as a bicycle-specific product. For example, WD-40 works as a cleaner, but does not provide the same benefits as a lubricant. On the other hand, bicycle lubricant usually contains Teflon, a substance that is designed to repel debris and water. The bicycle lubricant should do two things…
- Lessen the accumulation of debris such as dirt, grime, and dust.
The collection and accumulation of debris greatly accelerate the physical depreciation of your bicycle’s chain.
- Long-lasting and durable
If the lubricant easily wears off, this can also allow the quick physical depreciation of your bicycle’s chain.
Final Thoughts
While it is certainly more difficult to replace your bicycle’s chain without using the specialized tools for the job, we can never guarantee that we always have access to these items. In learning how to replace your bicycle chain without specialized tools, you set yourself up for success on the odd chance that you have an unfortunate roadside bicycle failure.
Remember to follow each and every step; every detail is either necessary or made for your convenience. Even when your bicycle chain is doing fine, always check on it, lubricate it, and clean it; this will ensure that your bicycle is always in tip-top shape! Never hesitate to invest in expensive products if you plan on using your bicycle on a regular basis. Protect your bicycle chain!